

Connecting Bedrock Edition to SQ-STF
Minecraft Bedrock Edition runs on laptop and desktop personal computers running Windows 10 and a variety of consoles, phones, and tablets. Bedrock allows the most cross-platform play (play with your friends on any device), but it is very limited in terms of mods.
You might have seen on the web that Bedrock and Java Edition can’t play together, and since we’re using Java Edition on our server, you might be wondering how you can join and play. We accomplish this through a plugin called Geyser that makes our server mimic a Bedrock server for those not using Java Edition.
While Geyser lets Bedrock players join, there are a couple of limitations:
- Since the Geyser proxy has to translate everything from the server to your Bedrock client, slower Internet connections may experience lag or glitchy map sections.
- Currently, you can’t bring your skin with you. There’s not anyway at this point for Bedrock skins to be loaded into the game through the Geyser system, but we’re hopeful that functionality can be added soon. You will likely appear in the game as the Minecraft default skin of Steve or Alex and you might even appear as one on your device, but another to everyone else, depending on how defaults are set.
- Things may look different for you. Since we use tutorials and texture packs specific to Java Edition in our development, things might look slightly different for you as you play and learn.
None of those things are a deal-breaker for most users, but if you think they’ll bother you, you might consider connecting with Java Edition instead (though you’ll have to install the software and buy an account).
[rsc_restrict_content allowed_to=”logged_in”]
Which Type of Device?
Instructions for connecting are different for consoles and all other devices, so choose which group of devices apply to you:
Windows 10 PC
iOS (iPhone, iPad)
Android (phones and tablets)
Xbox One
PS4
Nintendo Switch
Older Consoles
Non-Console Instructions
STEP 1: Get Minecraft
You’ll need Minecraft to join in the gameplay for SparkQuest. How you get it depends on your operating system and device.
For Windows 10 PCs: Purchase and download Minecraft directly. Note: If you already own Minecraft on Xbox, you can log into your Microsoft account on your Windows 10 computer and download Minecraft to your PC without having to purchase it (see here).
For iOS or Andriod Phones and Tablets: Open the store on your phone or tablet and search for the Minecraft app. Once you download and install the app, you’ll need to sign in with a Microsoft account to play (or create one).
STEP 2: Launch Minecraft
These screenshots are from an iPhone 7, but they should be fairly universal for other Bedroom Edition platforms (other than consoles, see below).
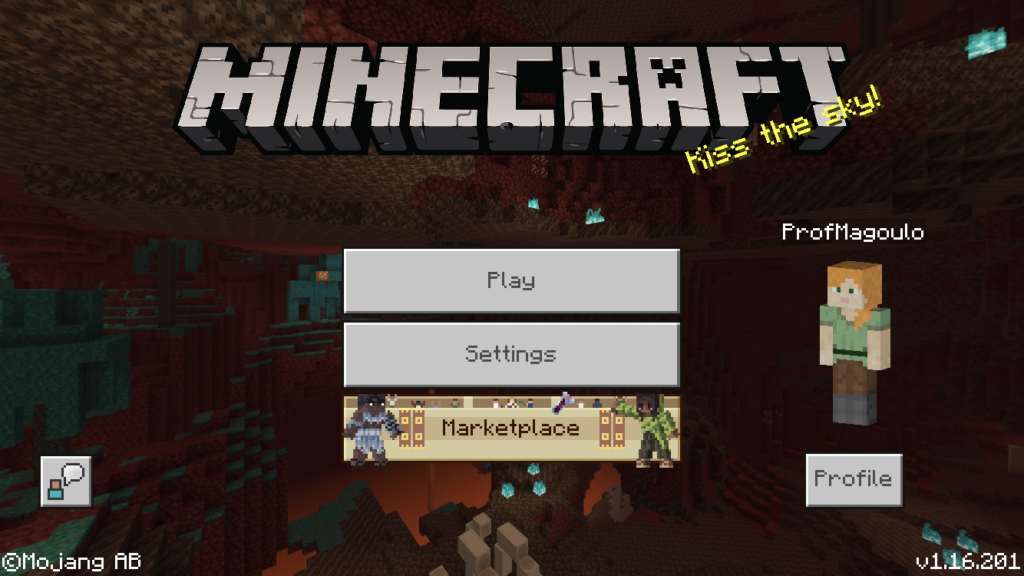
Open Minecraft and click the Play button.
You’ll see the world-choice dialog with three tabs at the top.
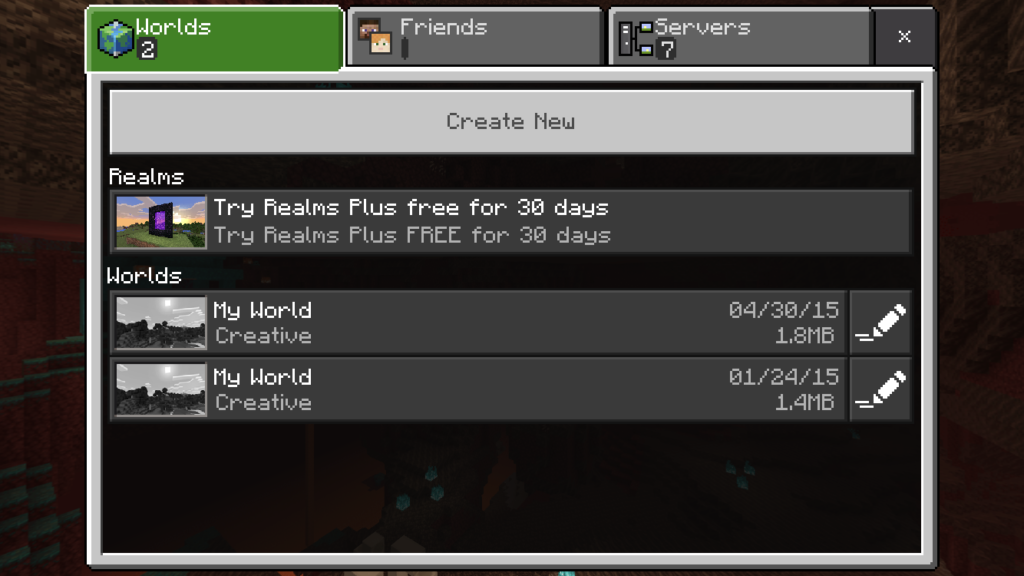
Pick the third “Servers” tab all the way on the right.
STEP 3: Add the SparkQuest STF Server
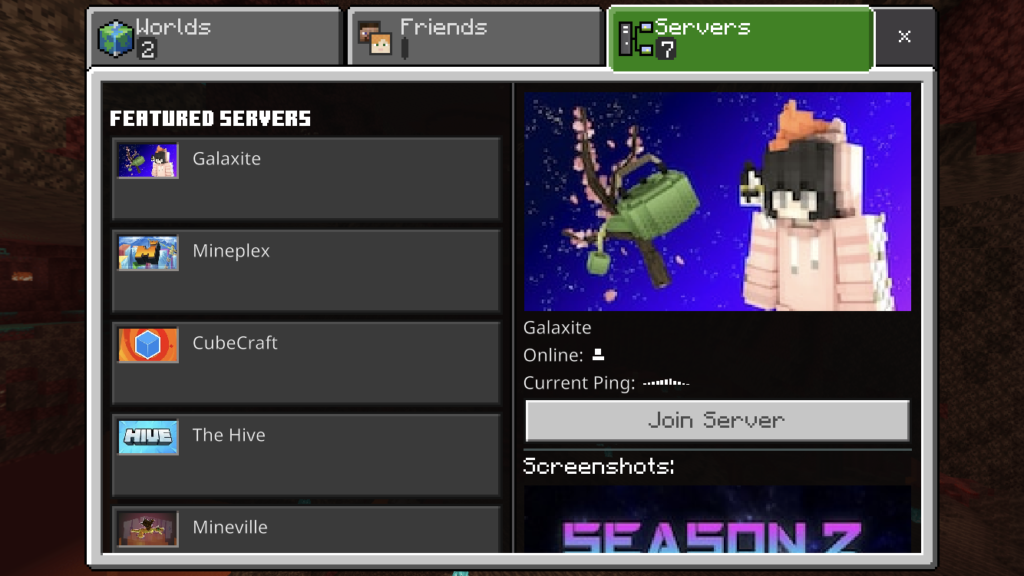
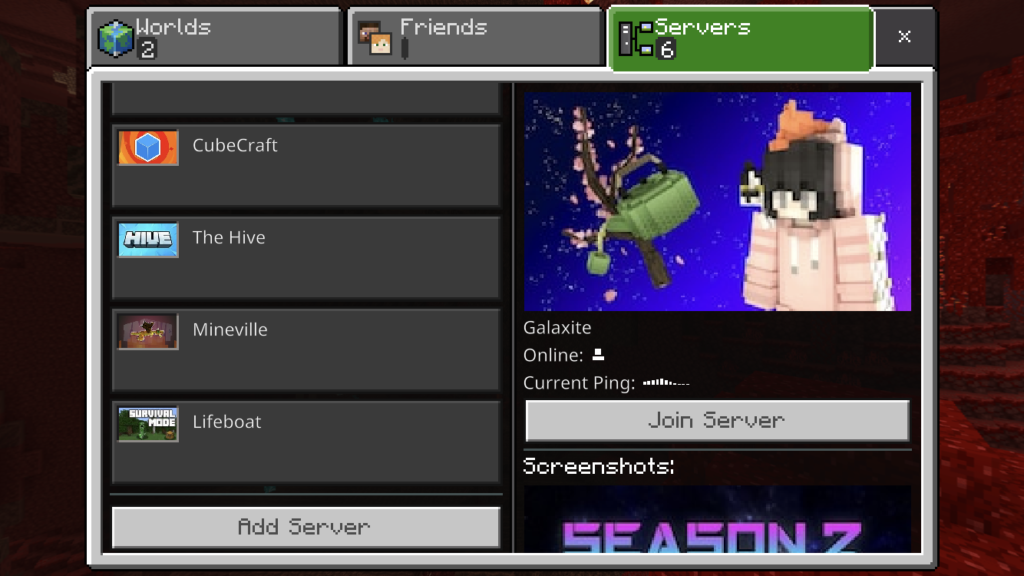
Scroll down to the end of the list of servers. If you’ve never added a custom server, you’ll see an “Add Server” button at the end of the list. If you have previously added custom servers, you’ll see a “Additional Servers” section with an “Add Server” button. Either way, click the button.
You’ll see a dialog that will allow you to enter the server details.
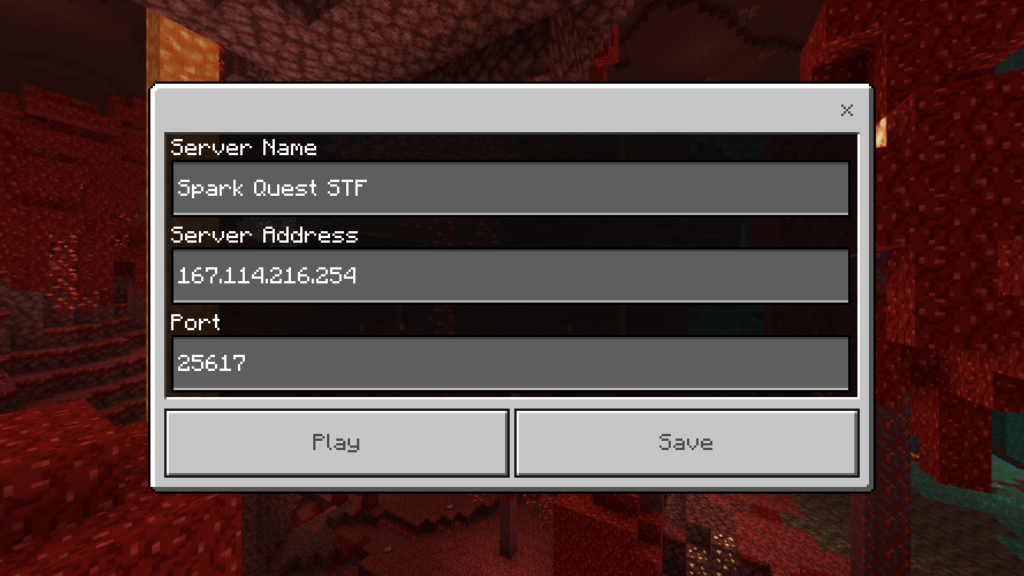
In Server Name type: SparkQuest STF
In the Server Address type: 167.114.216.254
In Port type: 25617
Click “Save” to add the server to your “Additional Servers” list. If you click “Play”, Minecraft will take you to the server for this session without saving the server to the list.
STEP 4: Join the Server And Look Around
Now that you’ve added the SparkQuest server, it will appear in the “Additional Servers” list. Select SparkQuest and a “Join Server” button will appear on the right. Click this and you’ll join the server.
You should spawn into the server on the Welcome Fountain which is the world spawn and see Judi, the Special Hostess of New City JCDP waiting for you. If Judi is not there, she’s probably showing someone else around. Feel free to wait for her to come back or go and look around yourself.
If you haven’t already, you might want to use the Welcome to New City Course to figure out some of the basics of life on our server.
An important note: you’ll notice our server is on survival mode so you can take damage and die from falls, mod attacks, and various other perils. The New City area is a WorldGuard region protected from mob spawning, but outside the city (what we call the Outlands), things get pretty wild at night!
Console Instructions
STEP 1: Get Minecraft
If you don’t have Minecraft yet, you’ll need it for the gameplay sections of SparkQuest.
If your console has a built-in store like an Xbox One or PS4, the best way to get Minecraft is to purchase it and down load it directly from the store.
You can also buy it directly from the Minecraft website. From the “Get Minecraft” page, select “Console” and then the specific console you’d like to play on. Pick a package and pay, and then you’ll receive further instructions about downloading and installing.
Once you have Minecraft on your console, you’re ready to setup and join the SparkQuest STF server.
STEP 2: Manually Set Your Console DNS
The console versions of Bedrock Edition do not have a built-in function to allow you to add your own servers. While Mojang hasn’t said why they don’t allow this, it’s probably to “preserve the user experience” of consoles (though it could also have to do with secret deals they cut with the big-name servers – they are Microsoft, after all).
There is a work around, but it involves using a server called Bedrock Connect. Developer Pugmatt created a DNS server and Minecraft server that work together to do this. You set your console’s DNS server manually to the Bedrock Connect DNS servers. After this, any link request to a minecraft server is intercepted and sent to the Bedrock Connect server. The Bedrock Connect server looks a little like when you first spawn into a world, but the only thing there is a GUI which allows you to connect to any custom server (or the official servers). Sounds complicated? Well, it kinda is. But if you are willing to give it a try, you’ll see that it’s not as hard as it sounds.
You can watch Pugmatt do it on his Nintendo Switch in the following video:
To do this on your console, you’ll need to change your console’s DNS servers manually. You’ll be using the following DNS addresses, just like Pugmatt did in his video.
DNS1: 104.238.130.180 DNS2: 8.8.8.8Here are instructions from various places on the web about how to do that for your particular console:
- Xbox One
- PS4
- Nintendo Switch (only use the address provided by us not those in the article)
If you have a different or older console capable of playing the most recent version of Minecraft, you should be able to search “Change DNS server ____” and supply your console name to find instructions.
STEP 3: Add The Server in Bedrock Connect
Open Minecraft on your console and click “Play”. You’ll see a screen with three tabs at the top: “Worlds”, “Friends”, and “Servers”. Click “Servers” and you’ll see a list of the console’s official servers.
You may see the message “Join to open Server List” under each server. This is means Bedrock Connect is working. Join any of these servers to continue. It doesn’t matter which one.
Instead of actually going to the server you selected to join, Bedrock Connect is going to use its DNS servers to intercept the request and take you to its server where you’ll see the following screen:
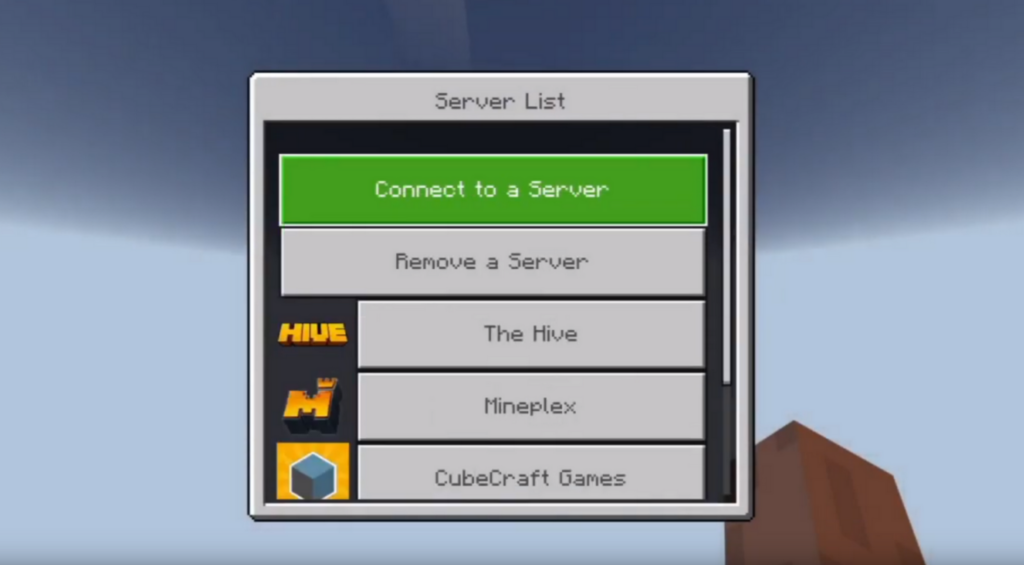
You’ll notice that the official servers are still listed here, so you’ll still be able to join those servers if you like. But now, you’ll be able to click “Connect to a Server” and add the SparkQuest STF server to the list.
When you click “Connect to a Server” you’ll a screen like this:
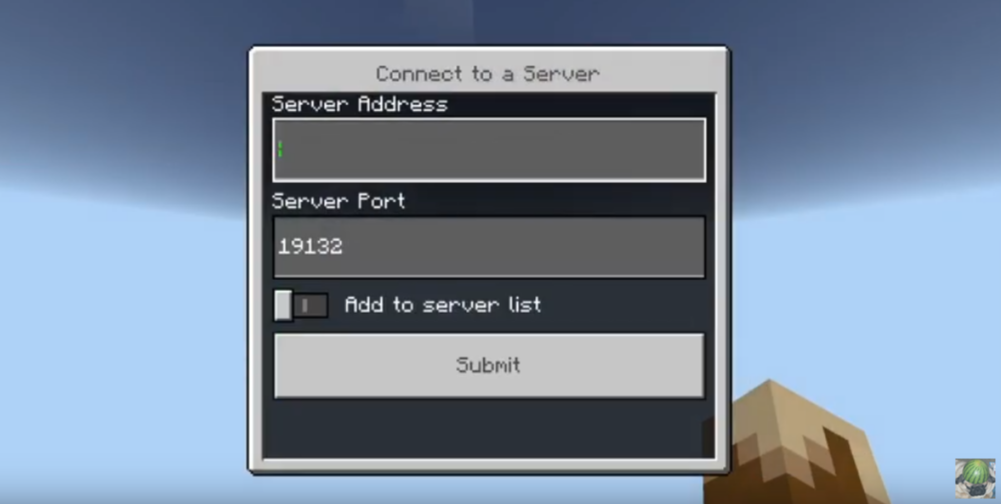
In the Server Address type: 167.114.216.254
In Server Port type: 25617
Select “Add to server list” so you don’t have to repeat this next time.
Finally, click “Submit”. You’ll see the SparkQuest STF server IP address listed now, and you can click it to join.
STEP 4: Join the Server And Look Around
You should spawn into the server on the Welcome Fountain which is the world spawn and see Judi, the Special Hostess of New City JCDP waiting for you. If Judi is not there, she’s probably showing someone else around. Feel free to wait for her to come back or go and look around yourself.
If you haven’t already, you might want to use the Welcome to New City Course to figure out some of the basics of life on our server.
An important note: you’ll notice our server is on survival mode so you can take damage and die from falls, mod attacks, and various other perils. The New City area is a WorldGuard region protected from mob spawning, but outside the city (what we call the Outlands), things get pretty wild at night!
[/rsc_restrict_content]